Holes
Full Course Map
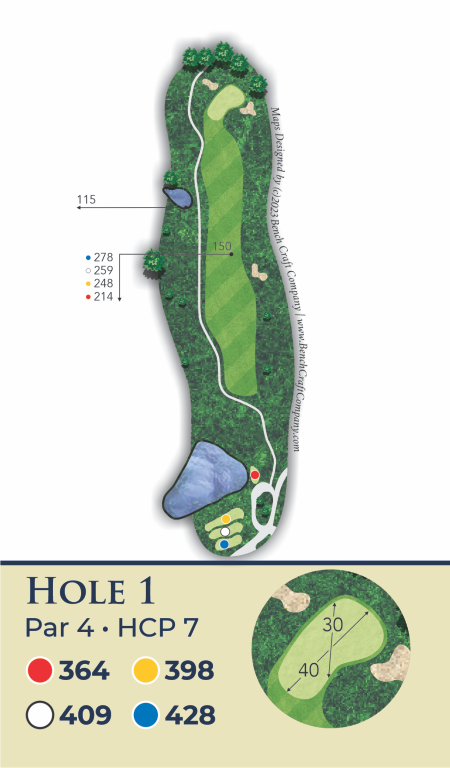
Hole 1
An inviting opening tee shot to a wide fairway the slopes gradually from left to right. Your approach shot will be easier from the left of fairway, but be careful not to go long as the rear bunker will peanlize shots that travel too far.
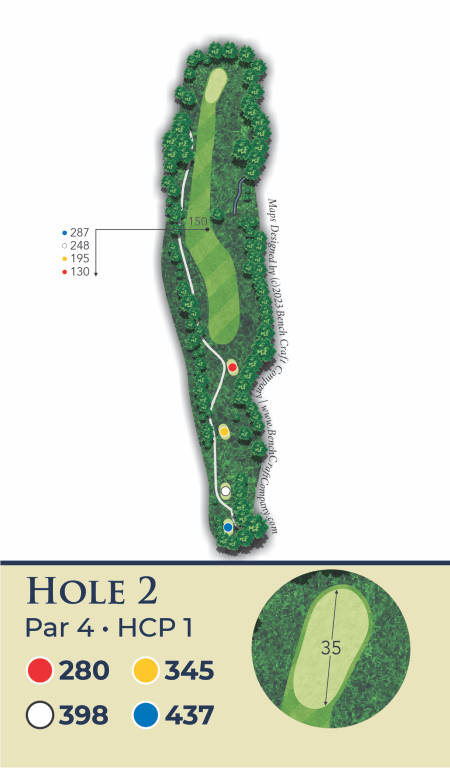
Hole 2
The course’s hardest hole features a tight tee shot with OB left and a creek that runs down the right side.Beware the nfamous birch tree,as it can easily block your approach shot.The deep green slopes gradually towards the front and falls away long and to the right.
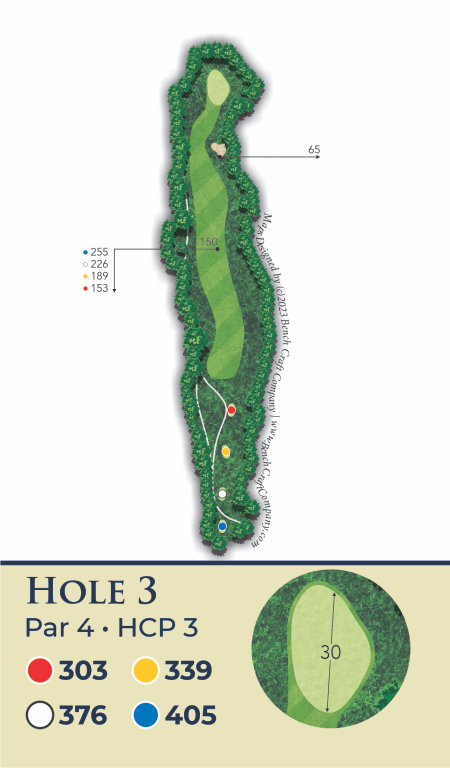
Hole 3
A beautiful sloping fairway with OB left and steep ravine to the right. A left of center tee shot is preferable, as the fairway slopes towards a right fairway bunker. Short is better than long on this blind approach shot into the green.
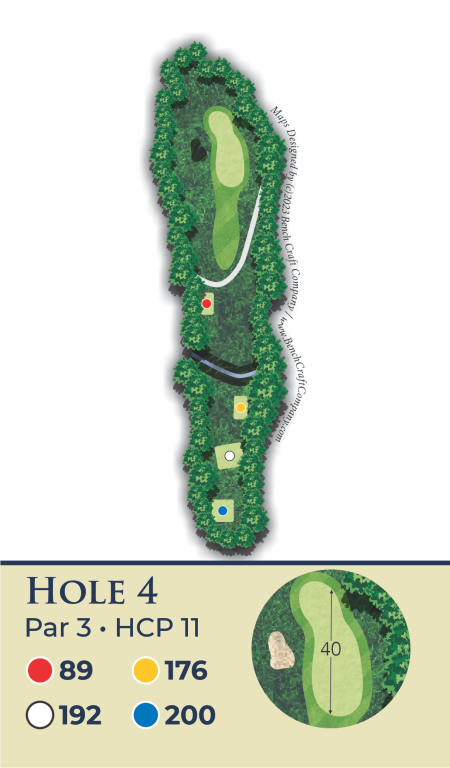
Hole 4
The first par 3 is a challenge especially from the back tees. The large two-tierd green is guarded by a penalty area on the left side and the deep gully directly on front of the tee, which jas collected may golf balls over the years.
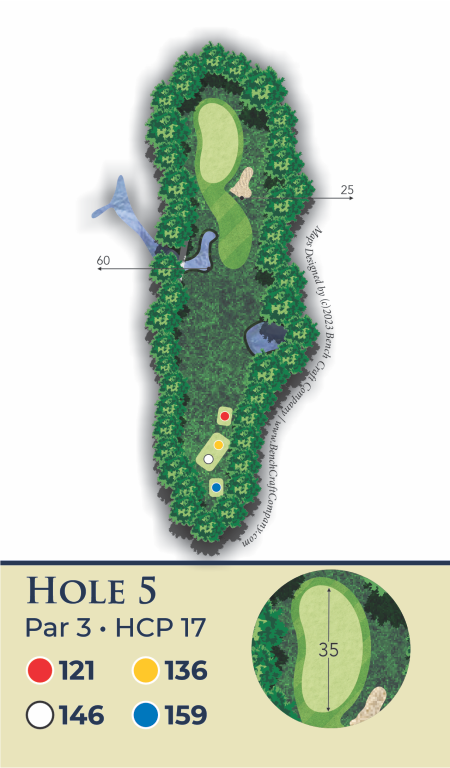
Hole 5
A scenic par 3 guarded by two water hazards and a bunker. The green slopes back to front and is usually very receptive, but can leave you with a long putt.
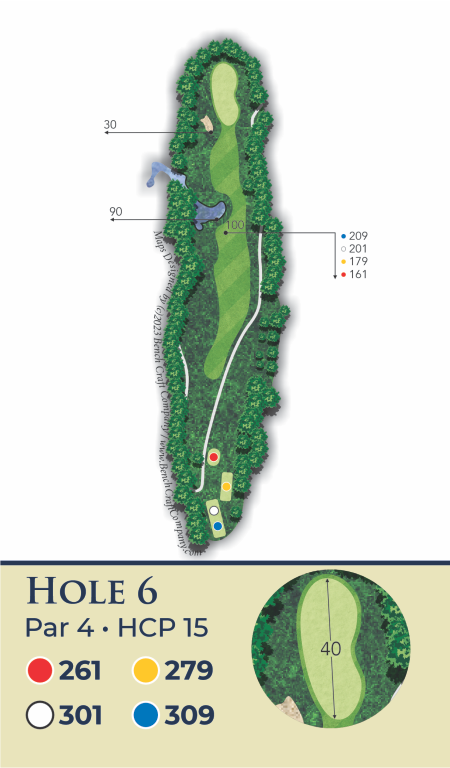
Hole 6
A classic risk-reward par 4. If the wind is favourable , a 250-260 yard drive will have you putting for eagle, but a less than perfect tee shot may find the water hazard. The safe option is playing to the 150 yd marker in the middle of the fairway and hitting a mid-iron to the large green which slopes from back to front.
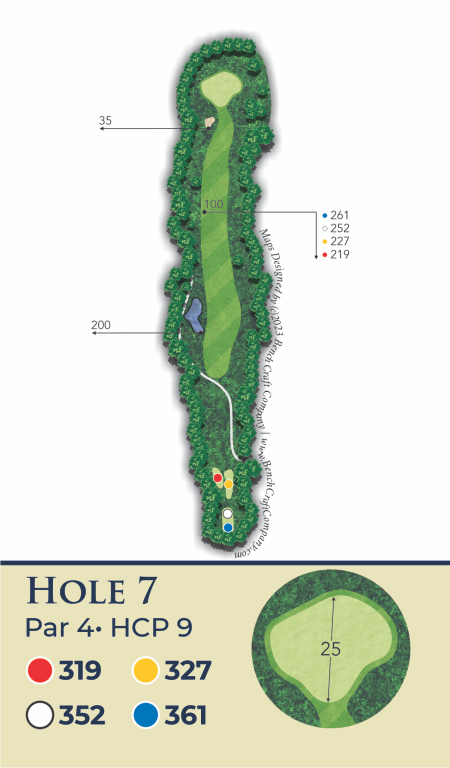
Hole 7
A straight away tee shot to a wide fairway with a water hazard to the left and deep thick woods to the right. The two tress on the right side of the fairway often block approach shots. A large multi-tiered green is protected by a bunker short and left.
Hole 8
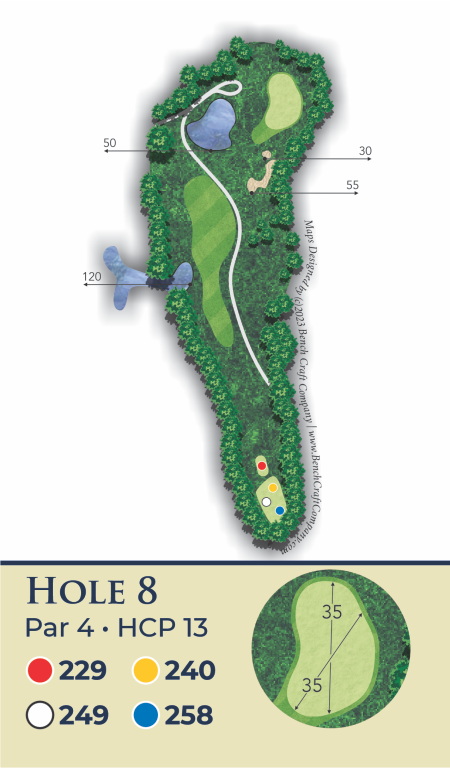
Another risk-reward par 4. With a favourable tee placement and the right wind, the risk may be worth the reward of eagle or birdie, but the safe shot is the 100 yd marker leaving a wedge into a large green. Don’t hit your tee shot through the fairway or you’ll be wet.
Hole 9
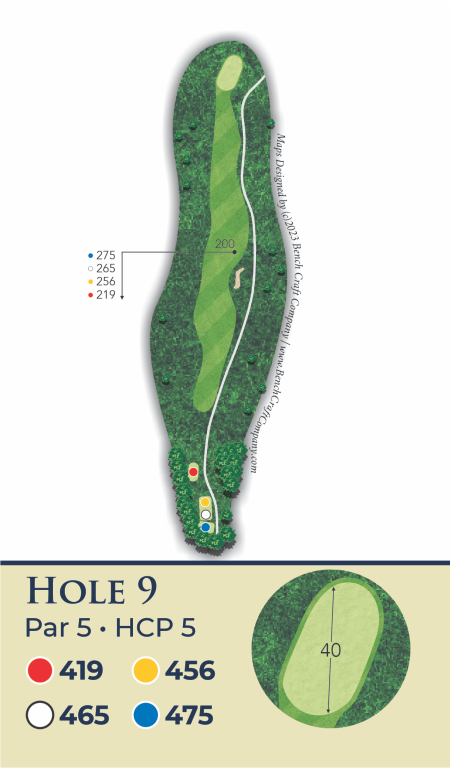
Bombs away on this par 5! A good tee shot over the hill makes reaching this in 2 possible for longer hittere. A bunker on the right side of the fairway will require that you lay up, should your ball come to rest in it. The green is surrounded by a bowl of rough that will stop shots that come in hot, but may leave you with a difficult chip.
Hole 10
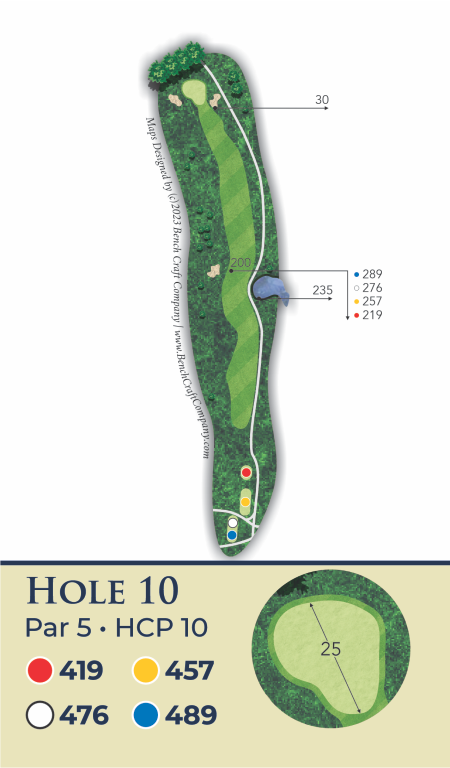
An inviting fairway that bottle-necks between a left side bunker and the reachable water and OB to the right. The approach to this large green plays downhill and is often blind. Golfers are advised to have a member of your foursome make sure the green is clear and watch the approach shots from the top of the hill.
Hole 11
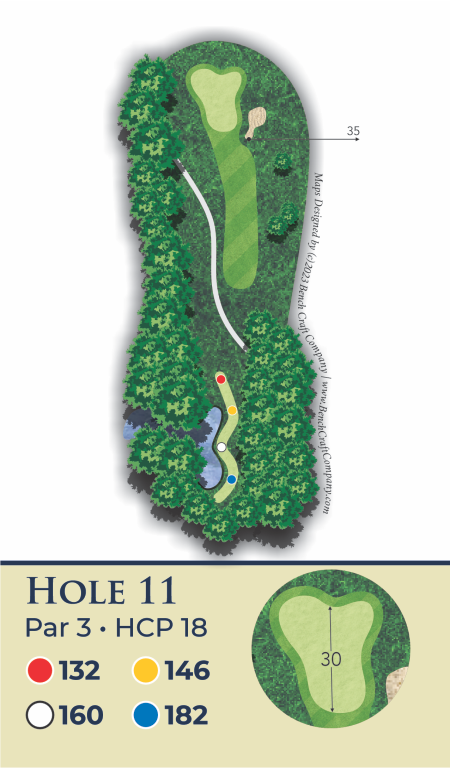
A tough par 3 that usually plays into the wind. The green is protected by a right side green bunker and woods that creep in to the left. Consider hitting a provisional to keep pace of play should your tee shot find the trees.
Hole 12
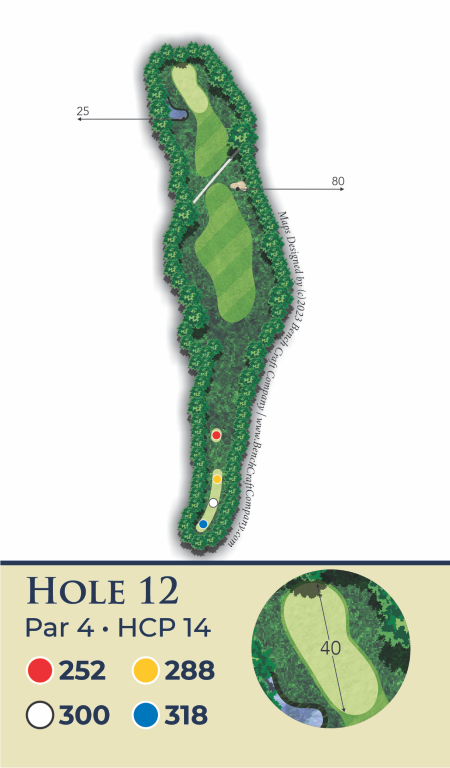
On this short par 4, the recommended shot is aimed at the right fairway bunker, between the 150 and 100 yd markers. The large two-tiered green slopes back to front and is protected by a water hazard on the left and thick woods long and to the right.
Hole 13
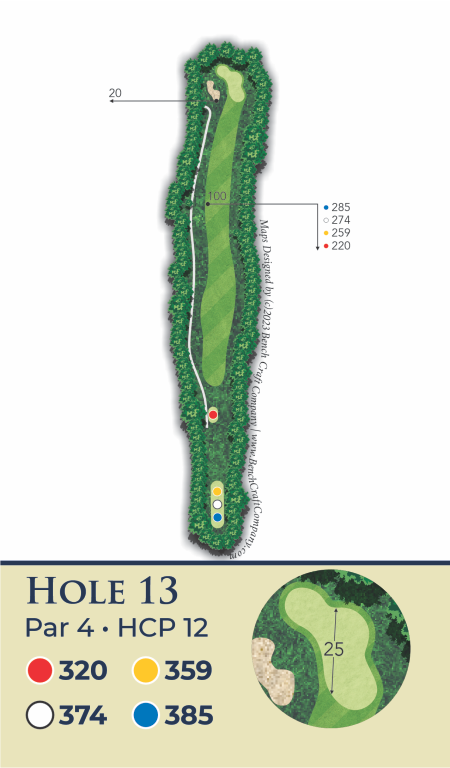
This par 4 has a large fairway with plenty of room on the left. Beyond the woods on the right is OB. This muti-tiered green is protected by a large bunker on the front left.
Hole 14
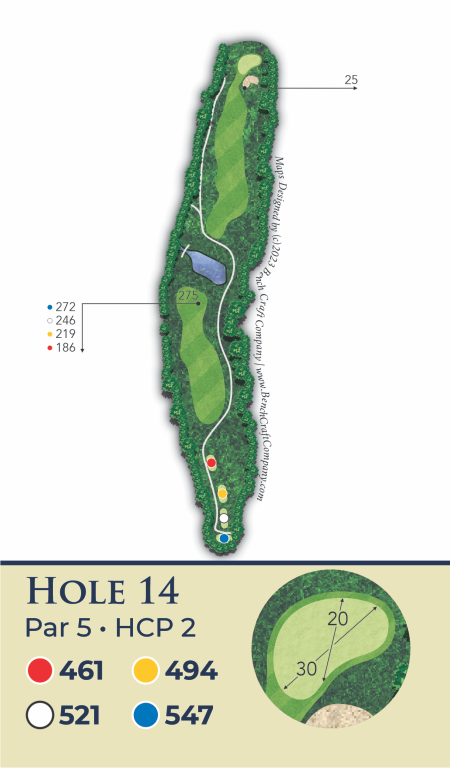
This par 5 is the most difficult par 5 on the property and the gem of Berwick Heights.A good tee shot is necessary in order to ensure you have a clear shot over the water hazard. Rarely is this small and well guarded green hit in two.
Hole 15
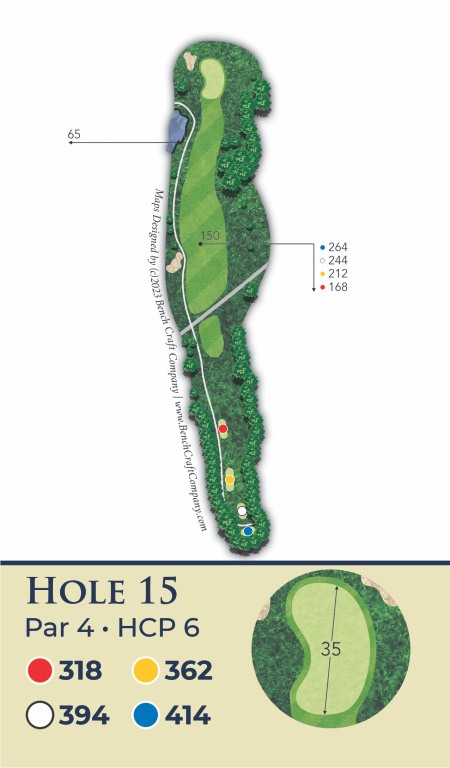
The preferred tee shot starts off the right edge of the fairway bunker and moves toward the center. Once your ball reaches the fairway, the wind may catch it, so be sure to watch the treetops to judge the wind. The green is protected by a bunker and large willow tree on the left.
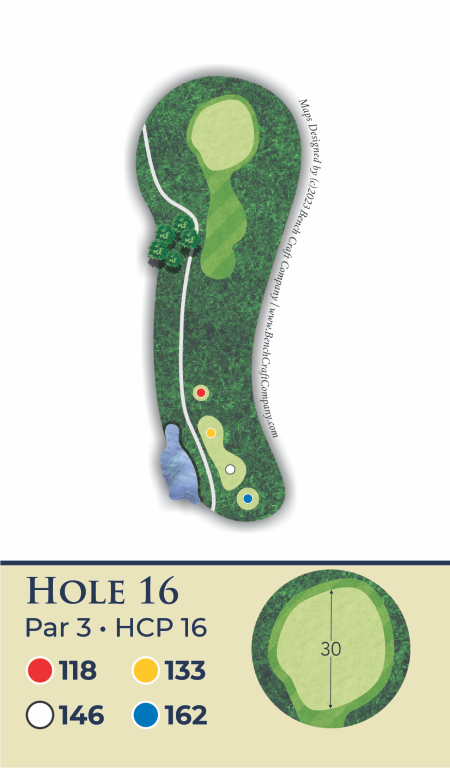
Hole 16
Our final par 3 can require anything from a Pitching Wedge to a 3-iron depending on the wind and pin placement. Make Sure you stop your ball on the right level on this large two-tiered green.
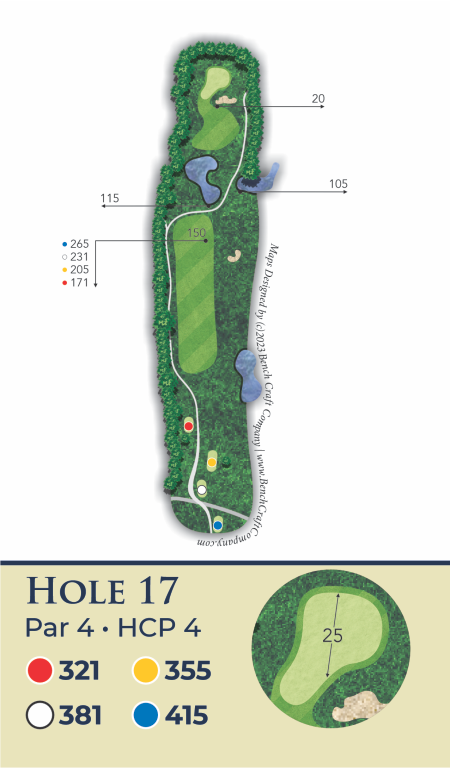
Hole 17
The large water hazard will dictate the tee shot for many players. Approach shots into this large green are protected by a deep front right bunker and multiple mounds surrounding the green.
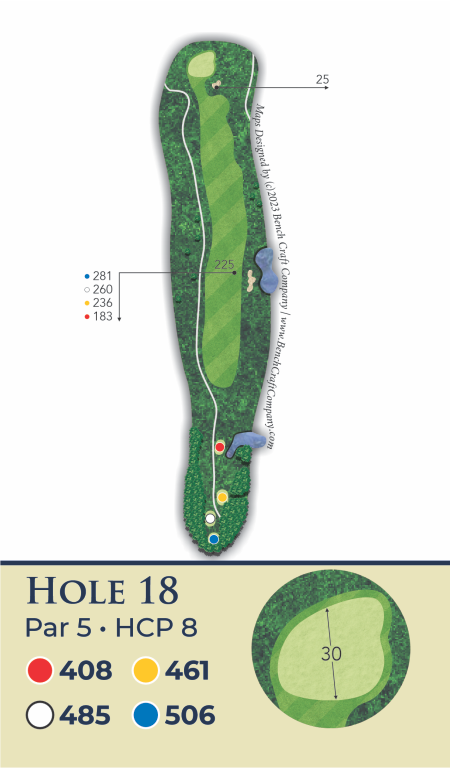
Hole 18
TThe wide open fairway favors the long ball hitters on this great finishing par 5. Winf will dictate whether the tiered green is reachable in two. This inviting hole give a great opportunity to end your day with a birdie or even an eagle!
